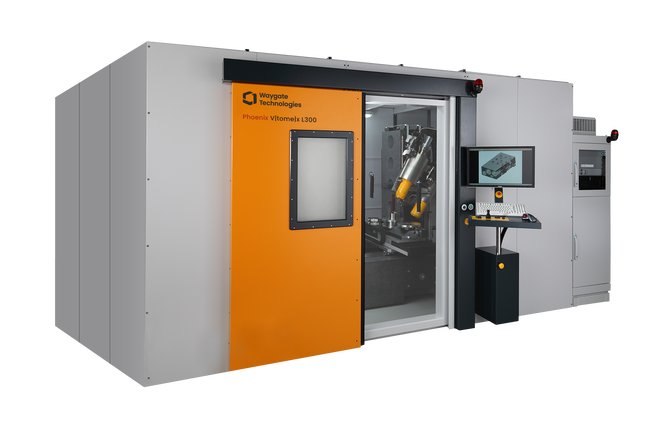
Phoenix V|tome|x L 300
The Phoenix V|tome|x L 300 is a versatile high-resolution walk-in cabinet microfocus system with nanoCT® option for 3D computed tomography (structure failure analysis & metrology) and 2D non-destructive X-ray inspection.
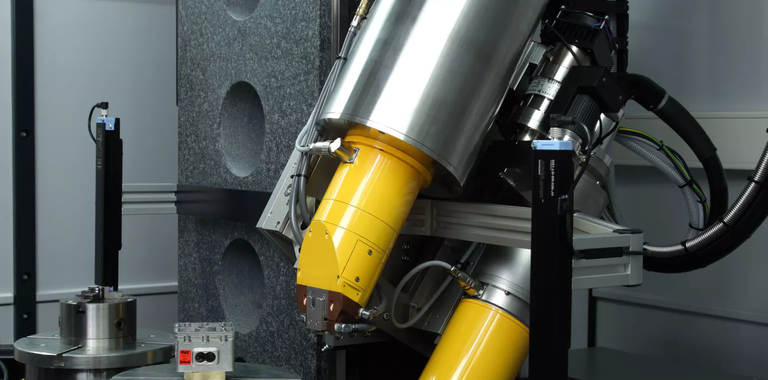
The Phoenix V|tome|x L 300 system is equipped with a unipolar 300 kV/500 W microfocus source and optional nano CT capability in Dual|tube combination with a 180kV/20W high-power nanofocus X-ray tube for best detail detactability of 2.0 µm.
The CT-scanner handles large samples up to 50 kg and up to 600 mm in diameter with extremely high precision. The system is a great flexible solution for void and flaw detection of composites, castings and precision parts, e.g. additive manufactured parts or turbine blades. It allows also high precision 3D metrology conform to VDI/VDE 2630-1.3.
Highlights
Benefits
Unique Benefits:
- Micro- and nanoCT Scanning at the limits of sample size and density (to 50 kg and up to 600 mm in diameter)
- Great flexibility for 2D and 3D inspection on a wide application range
Features
Some of the Phoenix V|tome|x L 300 features are:
- Fast CT acquisition and brilliant images by next generation highly sensitive Dynamic 41 detectors
- Leading exclusive Waygate Technologies core components such as X-ray tubes, detectors, software
- Patented optional features such as High-flux|target or Scatter|correct technology
- - Leading measurement accuracy of SD ≤ (6.8 ± L/100 mm) µm referring to VDI/VDE 2630-1.3 for i.e. reliable revalidation of system performance
Applications
Highest precision micro- and nanoCT, e.g. for
- Medium sized light alloys samples: Aluminum, Magnesium, Zinc
- Electronics: Complex/molded assemblies, sensors, actuators, battery cells and modules
- Complex assemblies (electrical/mechanical/medical)
- Structural inspection of 3D printed parts, composites, ceramics
- Reverse engineering: Metal, plastics, rapid prototyping, bio-mechanics
- Scientific research (plants, animals, geo- and materials sciences)
300 kV / 500 W microfocus X-ray tube - specially optimized for CT applications optionally combined with a high power 180 kV/20 W nanofocus X-ray tube for highest precision scans of smaller and lower absorbing samples
Waygate Technologies’ exclusive patented Scatter|correct technology enables you to perform highly precise CT scans of highly radiation scattering samples with the superior image quality of fan beam CT at the up to hundred times faster throughput of cone beam CT.
Adaptive scatter correct filter offering unrivaled image quality by significantly reducing artifacts caused by reduced grey values in high absorbing sample CT datasets
Double CT resolution at the same speed, or double throughput at the same quality level as 200 µm pitch DXR detectors. Compared to 16-bit detectors, the optimized 14-bit technology offers the highest efficiency with a dynamic range of 10000:1 and thus saves time in use and also generates less noise in the image.
Improve efficiency with faster microCT scans or doubled resolution with higher power on a smaller focal spot
This easily removable holder allows automatic change of different samples
In combination with the Sample|changer, the optional Filter|changer allows to perform mixed batch CT scans
Up to 10 times increased filament lifetime, ensuring long-term stability and optimizing system efficiency by Long-life|filament (optionally)
Scan longer parts with improved image quality to increase probability of detection (POD) with efficiency and ease.
Scan even larger parts with up to ~70% larger scanning volume.
Define a virtual scan rotation axis for ease of scan adjustment and flexible ROI CT scans
The Multi|bhc tool corrects streaking artifacts which typically occur as multiple dark streaking bands positioned between dense areas in multi-material samples.
Maximize speed and accuracy and reduce your operational costs by implementing robot loading into your inspection procedures
The system guarantees a measurement accuracy of SD ≤ (6.8 ± L/100 mm) µm according to VDI/VDE 2630-1.3 for reliable revalidation of the system performance and reproducible measurement applications.
The Ruby|plate calibration phantom and the compensation of thermal drift effects based on the use of temperature sensors enable automated measurement sequences and precision to a new level of performance for even larger parts.
This enables the improved VDI 2630 compliant accuracy specification and three times faster performance verification of multiple positions - reliably and reproducibly:
- Nominal-actual CAD comparison
- Dimensional measurements / wall thickness analysis
- Reverse Engineering / Tool Compensation
Fully automate your data acquisition, volume processing, and evaluation with ease
Global Industrial X-ray 2D and 3D CT Scanning Services from Waygate Technologies


