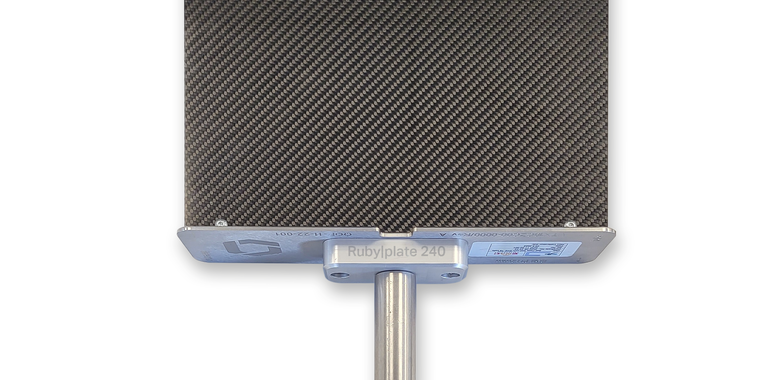
Waygate Technologies’ New Ruby|plate Calibration Phantom
In this article:
- Waygate Technologies Launches Ruby|plate 240 for Industrial CT: The new Ruby|plate 240 calibration phantom is designed to improve precision metrology in computed tomography (CT) for large and highly absorbing parts across industries like aerospace, automotive, and medical
- 3x Faster and Easier CT Setup: The Ruby|plate enables significantly faster calibration and setup for CT systems, reducing time and complexity while ensuring compliance with VDI/VDE 2630-1.3 standards
- High-Accuracy, Multi-Directional Measurement: Featuring precision spheres on a ceramic plate, the phantom allows accurate voxel size determination and reproducible measurements in all directions from a single scan
- Supports Large-Scale Part Inspection: With the industry’s largest sphere distance of 240 mm, the Ruby|plate 240 enables high-resolution inspection of parts up to 500 mm in diameter and 1,000 mm in height when paired with the Phoenix V|tome|x C450
- Ideal for R&D and Production Environments: The solution supports a wide range of applications including prototyping, reverse engineering, dimensional control, and final assembly verification, enhancing quality assurance workflows
Waygate Technologies’ New Ruby|plate Calibration Phantom Enhances Measurement Positions for Industrial Computed Tomography
Ruby|plate 240 enables precision metrology workflows in compliance with VDI/VDE 2630 guidelines for the inspection of highly absorbing and particularly large parts
HUERTH, Germany, September 29, 2022 – Waygate Technologies, a Baker Hughes business and world leader in non-destructive testing (NDT) solutions for industrial inspection, introduces the Ruby|plate 240 calibration phantom for industrial computed tomography (CT). Available now for the business’ Phoenix V|tome|x C450 CT scanner, it is designed to speed up and simplify precision metrology for the inspection of high absorbing and large parts in industries such as automotive, aerospace, additive manufacturing and medical technology.
Ruby|plate 240 features an extremely accurate and effective calibration body to determine the exact voxelsize and thus the correct geometry of the system. It facilitates three times faster and easier CT setup for precision measurement tasks performed with specified accuracy at multiple positions. Moreover, the setup is fully compliant with the internationally recognized VDI/VDE 2630-1.3 guidelines for the CT measurement of highly absorbing and large samples in research and development as well as on the production floors of manifold industry sectors – wherever there is a demand for higher precision and reliability requirements.
The patented Ruby|plate 240 calibration phantom with precision spheres on a ceramic plate allows reliable and reproducible measurements in all directions (horizontal, vertical and diagonal) with a single scan. It provides high-resolution insights to capture any internal surface with the precision of just a few micrometers, thereby allowing operators to detect any deviation quickly and non-destructively in geometry.
The new calibration phantom also has the industry’s largest sphere distance of 240 mm, allowing the specification of a wide range of applications across lab and production environments, such as prototyping, reverse engineering, quality control, production ramp-up, tool correction, dimensional control (e. g. wall thickness analysis), process optimization, post process control, and final assembly control. In combination with the Phoenix V|tome|x C450 CT system, precision measurement of larger parts up to 500 mm in diameter and 1,000 mm in height is now possible with the Ruby|plate 240. Paired with the Phoenix V|tome|x C450, the new phantom enables users to perform VDI compliant precision metrology with a specification of SD ≤ (15 ± L/50 mm) μm.
Learn more and contact Waygate Technologies:
- Ruby|plate general product family page
- Waygate Technologies LinkedIn Channel
- Waygate Technologies YouTube Channel
