Continental France Case Study: Waygate
Meeting increasing quality demands with leading technology
In this article:
- Continental France Enhances Failure Analysis with CT: To meet rising quality demands in the automotive sector, Continental France adopted Waygate Technologies’ industrial computed tomography (CT) systems for advanced failure analysis and 3D metrology
- Phoenix V|tome|x S Selected for Precision and Speed: The Phoenix V|tome|x S, a dual-tube microCT and nanoCT scanner, was chosen for its flexibility, high-resolution imaging, and ability to inspect complex, multi-material components efficiently
- Accelerated Product Development Cycles: By leveraging CT technology, Continental reduced inspection time and improved accuracy, enabling faster response to customer inquiries and shorter development timelines
- Improved Safety and Reliability in Automotive Components: The CT system helps detect internal defects in composite materials and assemblies, ensuring higher safety standards in vehicle manufacturing
- Strategic Partnership with Waygate Technologies: The collaboration between Continental and Waygate Technologies underscores the importance of expert support and cutting-edge NDT solutions in maintaining competitive advantage in the automotive industry
The automotive and automotive supply industry sets very high standards for the quality of products and components. For obvious reasons since millions of people around the world rely on the safety of their vehicles every single day. According to the European Automobile Manufacturers' Association (ACEA), there are 569 cars per 1,000 EU citizens (as of 2019). In Germany alone 48.5 million passenger cars are currently registered – more than ever before. France records around 32.03 million passenger cars. Defects in any installed components or faulty composite materials would have serious consequences. That's why quality testing is business-critical for manufacturers especially in this industry.
This is of course also true for Continental, one of the world's largest top 3 automotive suppliers with a 150-year company history. The leading mobility specialist already experienced several years ago that quality requirements were becoming increasingly stringent, and consequently also the requirements for non-destructive testing (NDT) methods. In 2014, Continental received a specific customer inquiry for non-destructive analyses in the area of product development. In general, the number of such inquiries has risen remarkably in recent years. However, it was soon clear that the laboratories in Toulouse did not have the necessary equipment to satisfy this request. So, a quick solution was needed. After some deliberation, Continental decided to ask their long-term technology partner, today’s Waygate Technologies, for assistance. Continental had already successfully deployed different solutions from Waygate Technologies in the field of quality inspection worldwide at that time.
Fast response times to customer inquiries are crucial
Continental therefore contacted their Waygate Technologies application engineers who are located in the Customer Solutions Center (CSC) in the French city of Limonest near Lyon. The CT experts were immediately on the spot and advised the automotive supplier to find the right solution for the specific requirement.
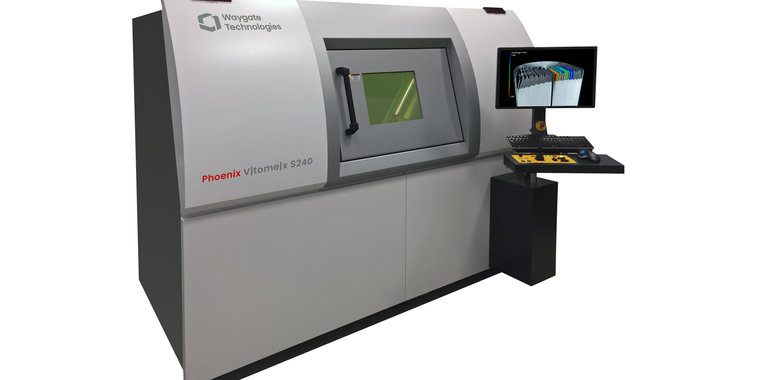
One testing challenge facing the automotive industry in particular is that very different materials with different density and composition are used. An inspection system must meet this challenge with the highest precision and the least amount of time and manual effort possible. It quickly became clear that industrial computed tomography (CT) technology was the solution of choice. The system chosen was Phoenix V|tome|x S, an advanced microCT and nanoCT scanner with unique flexibility and efficiency and world´s most often sold industrial dual-tube computed tomography system.
The CT inspection was initially performed using a Phoenix V|tome|x machine at Waygate Technologies' CSC. It proved beneficial that Waygate Technologies supported Continental as a long-term partner in the local CSC with inspections as a service before the automotive supplier could implement the V|tome|x system in their own lab. “The CSC enabled us to respond promptly to these time sensitive requests from our customers. And thus, remove the doubts concerning the quality of the first batches of production samples as well as the design of our prototypes in development”, says Nicolas Doret, Non-destructive group analysis responsible at Continental in Toulouse.
Right from the beginning Continental was convinced from the excellent quality of the CT images. Therefore, the company decided to invest in a Phoenix V|tome|x S240 system from Waygate Technologies to provide on-site non-destructive testing and inspection solutions for its entire product range: from simple components to the examination of complex assemblies, in order to meet their customers' needs in the areas of failure analysis and product validation during development.
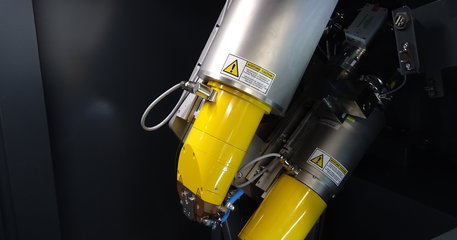
For the time, this technology was extremely innovative. The performance of the CT system used by Continental therefore very quickly attracted the interest of external companies from the aerospace and military industries in the region and throughout France. The dual-tube configuration of the Phoenix V|tome|x S240 and its versatile range of applications enabled the company to handle a wide range of inspection tasks, resulting in a faster return on investment.
Flexibility allows wide scope of application
In the first two years of operation Continental also received additional inquiries for precision measurement regarding internal geometries not accessible with conventional three-dimensional measuring systems as well as rubber or specific electronic devices, and the V|tome|x device could be used for this purpose as well. Continental's specialists developed inspection methods for the system that made it possible to perform dimensional measurements with sufficient accuracy. This worked even though the system´s manipulator was not granite based as usual in metrology systems.
Meanwhile, Waygate Technologies' V|tome|x S240 is used in three areas of quality control at Continental: for failure analysis, for product and process validation, and for 3D measurements, which continue to be in high demand.
Fit for the future of mobility
Continental plans to continue relying on Waygate Technologies' nearly 130 years of expertise for technology consulting and quality control devices that keep pace with industry trends. “Currently, the development of reverse engineering solutions and CAD reality comparisons is on the rise. Reverse engineering is used to go from a finished part back to its design data (CAD model) using scans. This enables us to ensure quality and performance. The Phoenix CT solutions of Waygate Technologies are also suitable for this purpose and we are already consulting on this”, says Nicolas Doret, Non-destructive group analysis responsible at Continental in Toulouse.
Within the last few years, industrial CT was mainly applied for scientific investigations, e.g. defect detection, failure analysis and dimensional measurement of inaccessible geometric features and testing of assemblies. For this purpose, individual virtual CT slices at precisely defined locations were analyzed.
Meanwhile, CT scanning for 3D digitization has become an important application of CT in the automotive and supplier industry because it opens up completely new possibilities, not only for reverse engineering, but also to get digital data about product quality for further development and process optimization. The main advantage is that the time-to-market for the development of new high-quality products can be noticeably shortened. And that is a real competitive advantage to stand out from other players in the market.

